Before I dive into the main discussion of this article, I would like to talk a little about Heroku.
Heroku is a cloud-based platform as a service (PaaS) that allows you to develop, run, and manage your entire application on the cloud.
PaaS is one of the cloud computing services that provides a service that allows you to manage applications seamlessly without the complexity of building and managing the service yourself.
Heroku supports programming languages like Java, NodeJs, PHP, Python, Go, and many others
This article drafts a step-by-step guide on how to deploy a Yii2 application on Heroku. It further explains how you can integrate it with the MySQL database.
Basic Requirements
In this article, I am assuming you already have your Yii2 application up and running on your local machine. Also, you have done the following, listed below:
You know how to make use of your terminal or command prompt for Windows.
You know some basic terminal commands.
You know some basic Git commands.
You have created an account with Heroku.
If you have gotten to this point, it means you have met the necessary requirements stated above. Just follow along as I walk you through this whole process.
1. Installing Heroku CLI on Your Local Machine
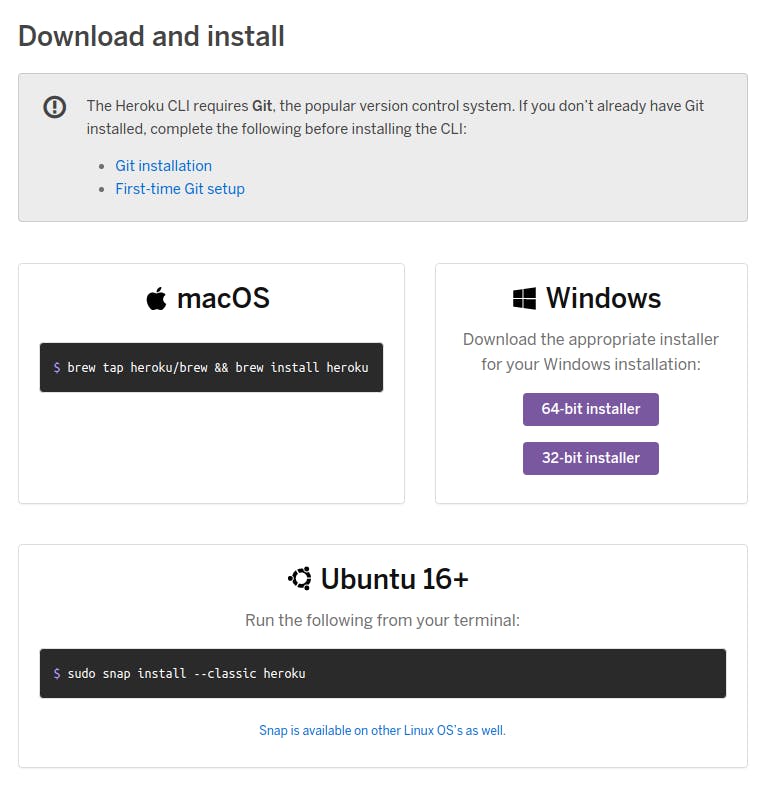
Here is a guide to help you install Heroku CLI on various operating systems.

Next, change your current working directory into your yii2 app
$ cd yii2-application
2. Login to Heroku
$ heroku login
3. Create a Procfile in your root directory
This is done to tell Heroku where to serve your application. By default, Heroku looks at the root directory of your application if you do not specify where to serve the application from. In a Yii2 application, the index.php (i.e the entry point into your application) resides in the web folder. This Procfile is created in the root directory of your Yii2 application.
$ echo "web: vendor/bin/heroku-php-apache2 web/" > Procfile
$ git init
$ git add .
$ git commit -m "Add Procfile"
4. Create a New Application on Heroku
This is where your source code goes into
$ heroku create
Note that when you create a new app, a git remote URL is created. This remote URL is called heroku. To confirm run
$ git remote -v
5. Setting Application Environment Variables
$ heroku config:set VARIABLE_NAME=value
Let's set up one of the common variables that are always in our .env file. e.g APPLICATION_ENV
$ heroku config:set APPLICATION_ENV=production
6. Push to Heroku
$ git push heroku master
$ heroku open
7. Integrating MySQL Database
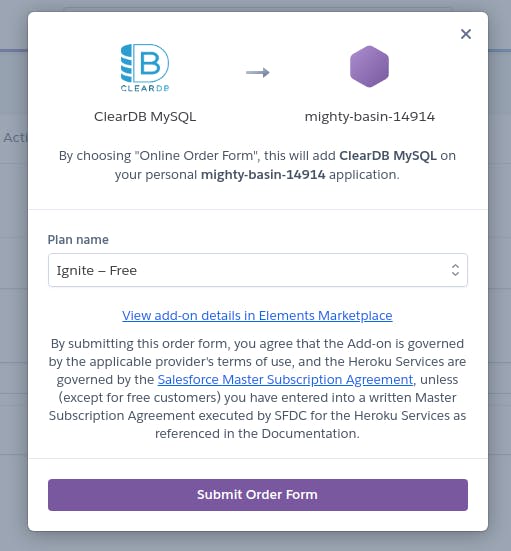
Now we need to add MySQL database to our Yii2 application. Open your Heroku dashboard, and click on the application you created using the heroku create command. Next, click on the Resources tab. Search for ClearDB MySQL on the Add-ons search field.

Click on ClearDB MySQL. For now, I will make use of the free tier that it offers and proceed to click on the Submit button.

Note: If this is your first time, you will be prompted to enter your credit card information. Not to worry, you won't be charged as long as you are using the free tier.
Next, run the command below to retrieve your database credentials
$ heroku config | grep CLEARDB_DATABASE_URL
You should see something that looks like this on the terminal.
$ CLEARDB_DATABASE_URL => mysql://[database_username]:[database_password]@[database_hostname]/[database_name]?reconnect=true
Next, set your database credentials on Heroku
$ heroku config:set DB_USERNAME=database_username DB_NAME=database_name DB_PASSWORD=database_password DB_HOSTNAME=database_hostname
Lastly, we need to run a migration to migrate all the tables into the database. To do this, we first need to open Heroku bash then run yii migrate command
$ heroku run bash
$ php yii migrate
Everything now works as it should.
If you feel like you want to know more about Heroku and PHP, kindly click here to visit Heroku's official documentation.
Thanks for taking the time to read this article, I hope you find it helpful. Feel free to reach out or drop a comment. Feedback is highly appreciated.